Implementing Azure Container Registry Retention with Brigade

If you are doing any work related to containers and Azure, you are most likely using Azure Container Registry for storing images. The amoun of storage available for these images depends on the pricing tier you are using.
If you exceed this amount of storage, you will pay an additional fee for every GB of image data that exceeds the limit. See the table below for the current pricing details.

image_thumb[7]
Azure Container Registry pricing details

100GB of included storage might sound much, but you will pretty soon find out that your CI pipelines will fill up this space with new image versions being pushed on every commit.

Now, if you select the Premium tier, there is a retention policy feature available (https://docs.microsoft.com/en-us/azure/container-registry/container-registry-retention-policy), but the Premium tier will cost you three times as much.

Implementing purging of older images in ACR yourself is easy using the Azure CLI/Powershell, but you need some mechanism of hosting and running these scripts whenever you push a new image to your registry.

This is a perfect case for Brigade, it already comes with a Container Registry gateway that will respond to webhooks and translate that into Brigade events, and you can host everything inside your existing Kubernetes cluster.

See my introductory post on Brigade here:
https://blog.ehn.nu/2020/01/event-driven-scripting-in-kubernetes-with-brigade/

The overall solution will look like this:

image_thumb[13]

Whenever a new image is pushed the an Azure Container Registry, it will send a request to a Brigade Container Registry gateway running in your Kubernetes cluster of choice. This will in turn kick off a build from a Brigade project, that contains a script that will authenticate back to the registry and purge a selected set of older images.

The source code for the Brigade javascript pipeline, including the custom Bash script is available here:
https://github.com/jakobehn/brigade-acr-retention

Let’s go through the steps needed to get this solution up and running. If you want to, you can use the GitHub repository directly, or you’ll want to store these scripts in your own source control.

Create a Service Principal

To be able to purge images in Azure Container Registry from a Docker container running in our Brigade pipeline, we will create a service principal. This can be done by running the following command:

az ad sp create-for-rbac –name ACRRetentionPolicy
Changing “ACRRetentionPolicy2” to a valid URI of
http://ACRRetentionPolicy, which is the required format used for service principal names
{
   “appId”: “48408316-6d71-4d36-b4ea-37c63e3e063d”,
   “displayName”: “ACRRetentionPolicy”,
   “name”:
http://ACRRetentionPolicy,
   “password”: “<<EXTRACTED>>”,
   “tenant”: “<<EXTRACTED>>”
}

Make a note of the appId, password and tenantId as you will be using them later on.

Install Brigade

If you haven’t already, install Brigade in your Kubernetes cluster. Make sure to enable Brigade’s Container Registry gateway by setting the cr.enabled property to true:

helm repo add brigade https://brigadecore.github.io/charts
helm repo update
helm install -n brigade brigade/brigade –set cr.enabled=true,cr.service.type=LoadBalancer

Verify that all components of Brigade are running:

PS C:\brigade> kubectl get pods   

NAME                                            READY   STATUS    RESTARTS   AGE
brigade-server-brigade-api-58d879df79-dczl6     1/1     Running   0          8d
brigade-server-brigade-cr-gw-577f5c787b-kx2m4   1/1     Running   0          8d
brigade-server-brigade-ctrl-8658f456c4-pbkx2    1/1     Running   0          8d
brigade-server-kashti-7546c5567b-ltxqm          1/1     Running   0          8d

List the services and make a note of the public IP address of the Container Registry gateway service:

PS C:\brigade> kubectl get svc                                                                                                        
NAME                           TYPE           CLUSTER-IP     EXTERNAL-IP     PORT(S)        AGE
brigade-server-brigade-api     ClusterIP      10.0.188.158   <none>          7745/TCP       8d
brigade-server-brigade-cr-gw   LoadBalancer   10.0.6.148     40.114.186.81   80:31844/TCP   8d
brigade-server-kashti          ClusterIP      10.0.193.112   <none>          80/TCP         8d
kubernetes                     ClusterIP      10.0.0.1       <none>          443/TCP        13
d


Brigade script

Every Brigade pipeline reference a Javascript file that will respond to various events and chain the jobs together using container images. As seen below, the necessary parameters are passed in as environment variables.
The values of the variables are fetched from the secrets from the Brigade project that we’ll create in the next step.

When the image_push event is received (from the Brigade Container Registry gateway), the script creates a job, passes in the environment variables and define the tasks to be run inside the container. We are using the mcr.microsoft.com/azure-cli Docker image, which is the official image for using the Azure CLI inside a container. The task runs the purge-images.sh script, which is available in the /src folder. When a Brigade project refers to a Git repository, the source will automatically be cloned into this folder inside the container, using a Git side-car container.

const { events, Job} = require(“brigadier”);

events.on(“image_push”, async (e, p) => {
    
     var purgeStep = new Job(“purge”, “mcr.microsoft.com/azure-cli”)
     purgeStep.env = {
         subscriptionName: p.secrets.subscriptionName,
         registryName: p.secrets.registryName,
         repositoryName: p.secrets.repositoryName,
         minImagesToKeep: p.secrets.minImagesToKeep,
         spUserName: p.secrets.spUserName,
         spPassword: p.secrets.spPassword,
         spTenantId: p.secrets.spTenantId
     }
     purgeStep.tasks = [
         “cd src”,
         “bash purge-images.sh”,
       ];     
     purgeStep.run();   

  });

Script for purging images from Azure Container Registry

The logic of purging older images from the container registry is implemented in a bash script, called purge-images.sh, also located in the GitHub repository. It authenticates using the service principal, and then lists all image tags from the corresponding container registry and deletes all image except the latest X ones (configured through the minImagesToKeep environment variable).

#Login using supplied SP and select the subscription
az login –service-principal –username $spUserName –password $spPassword –tenant $spTenantId
az account set –subscription “$subscriptionName”

# Get all the tags from the supplied repository
TAGS=($(az acr repository show-tags –name $registryName –repository $repositoryName  –output tsv –orderby time_desc))
total=${#TAGS[*]}

for (( i=$minImagesToKeep; i<=$(( $total -1 )); i++ ))
do
      imageName=”$repositoryName:${TAGS[$i]}”
      echo “Deleting image: $imageName”
      az acr repository delete –name $registryName –image $imageName –yes
done

echo “Retention done”

Creating the Brigade project

To create a project in Brigade, you need the Brigade CLI. Running brig project create will take you through a wizard where you can fill out the details.
In this case, I will point it to the GitHub repository that contains the Brigade.js file and the bash script.

Here is the output:

PS C:\acr-retention-policy> brig project create                                                                                       
? VCS or no-VCS project? VCS
? Project Name jakobehn/brigade-acr-retention
? Full repository name github.com/jakobehn/brigade-acr-retention
? Clone URL (
https://github.com/your/repo.git) https://github.com/jakobehn/brigade-acr-retention.git
? Add secrets? Yes
?       Secret 1 subscriptionName
?       Value Microsoft Azure Sponsorship
? ===> Add another? Yes
?       Secret 2 registryName
?       Value jakob
? ===> Add another? Yes
?       Secret 3 repositoryName
?       Value acrdemo
? ===> Add another? Yes
?       Secret 4 minImagesToKeep
?       Value 5
? ===> Add another? Yes
?       Secret 5 spUserName
?       Value <<EXTRACTED>>
? ===> Add another? Yes
?       Secret 6 spPassword
?       Value <<EXTRACTED>>
? ===> Add another? Yes
?       Secret 7 spTenantId
?       Value <<EXTRACTED>>
? ===> Add another? No
? Where should the project’s shared secret come from? Specify my own
? Shared Secret <<EXTRACTED>>
? Configure GitHub Access? No
? Configure advanced options No
Project ID: brigade-c0e1199e88cab3515d05935a50b300214e7001610ae42fae70eb97

Setup ACR WebHook

Now we have everything setup, the only thing that is missing is to make sure that your Brigade project is kicked off every time a new image is pushed to the container registry. To do this, navigate to your Azure Container Registry and select the Webhooks tab. Create a new webhook, and point it to the IP address of your container registry gateway that you noted before. 

Note the format of the URL, read more about the Brigade container registry here: https://docs.brigade.sh/topics/dockerhub/

image_thumb[1]
Creating an ACR webhook

To only receive events from one specific repository, I have specified the Scope property and set it to acrdemo:*, which effectively filters out all other push events.

Trying it out

Let’s see if this works then, shall we? I’m pushing a new version of my demo images (jakob.azurecr.io/acrdemo:1.17) , and then run the Brigade dashboard (brig dashboard).

I can see that a build has been kicked off for my project, and the result looks like this:

image_thumb[4]

I can see that I got a image_push event and that the build contained one job called purge (that name was specified in the Javascript pipeline when creating the job). We can drill down into this job and see the output from the script that was executed:

image_thumb[5]

Since I specfied minImageToKeep to 5, the script now deleted version 1.12 (leaving the 5 latest versions in the repository).

Hope you found this valuable!


Debugging Dapr applications with Visual Studio Code

I’ve been playing around with the Dapr project recently, which is an interesting approach to building distributed, “microservices” applications. Tha main idea with Dapr is to make it easier for developers to implement distributed application running either in the cloud or on “the edge” (e.g. anywhere else), by implementing a lot of the cross-cutting concerns that is a part of every distributed app. Dapr consists of a number of building blocks, such as Service Invocation, State Service, Pub/Sub messaging and distributed tracing.

Read more about the main concepts of Dapr here:
https://github.com/dapr/docs/tree/master/concepts

Dapr

The architecture of Dapr makes local devlopment a bit special. Dapr uses a Sidecar architecture, meaning that the Dapr runtime runs in a separate process (or container if you’re running in Kubernetes), and all interaction beween your application and the Dapr runtime is done using HTTP/gRPC calls to that sidecar process:


Image from https://github.com/dapr/docs/tree/master/overview

You can read more about how to run Dapr locally here, but essentially you’ll use the Dapr CLI to run or debug your application. The Dapr CLI will in turn launch your application and configure the necessary environment variables and sidecar pod injectors etc to make sure that your application can communicate with the Dapr runtime.

This can be a bit cumbersome when you want to be able to quickly iterate when working locally, but Visual Studio Code makes this process fairly simple. Let’s walk through how to set this up.

Debugging an ASP.NET Core Dapr app

First of all, if you haven’t installed Dapr, follow the simple instructions here to do so. Use the standalone mode when you get started:
https://github.com/dapr/docs/blob/master/getting-started/environment-setup.md

Next up, we will be using a Visual Studio Code extension for Dapr that can automate and simplify a lot of tasks when it comes to working with Dapr applications, so go ahead and install this:

https://github.com/microsoft/vscode-dapr

image

Let’s create a ASP.NET Core web application and see how we can build, run and debug this application using Visual Studio Code.

  1. Create a new folder for your application
  2. In the folder, create a new ASP.NET Core web app using the dotnet CLI:dotnet new mvc -n daprweb
  3. Open Visual Studio code in the current folder by running:code .
  4. To configure how VSCode runs and debug an application you need to add and/or modify the launch.json and tasks.json files that are located in the .vscode folder in the root directory.
    If you don’t see them you need to restore and build the project at least once in VSCode.After that, hit CTRL + P and then select Dapr: Scaffold Dapr Tasks
     
    image


  5. For the configuration, select the .NET Core Launch (web) configurationimage
  6. Give the app a name (daprweb) and select the default port for the app (5000)
  7. When done, take a look at the launch.json file. You’ll see that the extension added a new configuration called .NET Core Launch (web) with Dapr. It is very similar to the default .NET Core launch configuration, but is has a special preLaunchTask and a postDebugTask. These tasks have also been added by the extension to the tasks.json fileimage
  8. Take a look at Tasks.json to see the new tasks:image

    You can see that the darp-debug task has the type “daprd” which is a reference to the Dapr CLI debugger. The task depends on the build task, which means that it will trigger a build when you launch the configuration. The other task is daprd-down, which is called when you stop a debug session, which enables the extension to finish Daprd correctly.

  9. To debug the application, simply navigate to the Run tab and select the .NET Core Launch (web) with Dapr configuration in the dropdown bar at the top:image
  10. If you set a breakpoint in the Home controller, it should be hit immediately when you start debugging the application:image

Debugging multiple Dapr applications

What about running and debugging multiple Dapr applications at the same time? If you for example have a web app that calls an API app, you would most likely want to be able ro run and debug them simultaneously.

It works pretty much the same way. Here I have added a ASP.NET Core Web API application, and then added another launch configuration:

image

To be able to build and run both applications at the same time, the best way is to add a solution file with the two projects in it, and then change the Build task to build from the solution folder instead.

Here I have changed the argument to the build command to point to the workspace folder root:

image

Now, to easily start both applications with a single command, you can add a compound launch configuration that will reference the applications that you want to start. Add the following to your launch.json file:

image

Select this configuration when starting a debug session in VSCode, this will start up both applications at the same time.

image

I hope this post was helpful, I’ll write more posts about Dapr in the near future so stay tuned

How Visual Studio 2019 supports containerized applications

Visual Studio has for quite some time been adding features to make it easier to create, build, run and debug Dockerized applications.  This is great, because Docker can be quite daunting when you intially approach it and anything that makes that journey easier should be encouraged.

However, with this tooling support comes some magic that is performed behind the scene when you hit F5 in Visual Studio. I have on numerous different occasions explained to developers what actually happens when you build and debug a Dockerized application in Visual Studio. With this post, I can send them here instead the next time Smile

Adding Docker support

Let’s start by taking an existing web project in Visual Studio 2019 and add Docker support to it, and then we’ll examine the details.

If you have a .NET or .NET Core application open in Visual Studio, you can right-click the project and select “Add –> Docker support”. You will be prompted if you want to use Linux or Windows containers, if you are doing .NET Core you will most likely want to use Linux containers here, if it is a full .NET Framework apps you have to go with Windows containers here.

Note:
The below walkthrough are for Linux containers. For Windows containers the Docker file will look a lot different, but the overall process is the same

Here, I have a ASP.NET Core 3.1 web application called MyDockerWebApp:

image

This will generate the following Dockerfile and add it to the project:

FROM mcr.microsoft.com/dotnet/core/aspnet:3.1-buster-slim AS base
WORKDIR /app
EXPOSE 80
EXPOSE 443

FROM mcr.microsoft.com/dotnet/core/sdk:3.1-buster AS build
WORKDIR /src
COPY ["MyDockerWevApp/MyDockerWevApp.csproj", "MyDockerWevApp/"]
RUN dotnet restore "MyDockerWevApp/MyDockerWevApp.csproj"
COPY . .
WORKDIR "/src/MyDockerWevApp"
RUN dotnet build "MyDockerWevApp.csproj" -c Release -o /app/build

FROM build AS publish
RUN dotnet publish "MyDockerWevApp.csproj" -c Release -o /app/publish

FROM base AS final
WORKDIR /app
COPY --from=publish /app/publish .
ENTRYPOINT ["dotnet", "MyDockerWevApp.dll"]

This is a multi-stage Docker file, which means that when Docker builds this file it will go through multiple phases (each starting with a FROM statement) where each statement will produce a temporary image, that can be used in a subsequent step. This makes it possible to generate optimized images in the end suitable for running in production. (Again, for .NET Framework apps and Windows containers, the generated Dockerfile will not be a multi-stage file)

The Docker file looks a bit unusual though, the first phase called “base” doesn’t really do anything. What’s the point with that phase? As it turns out, this phase has  a special meaning for Visual Studio, we’ll see when we examine how Visual Studio runs and debug Docker projects.

Building and running the containerized application

When building the project, you might expect that Visual Studio would build the Dockerfile and produce a Docker image. This is not the case however, at least not when building the Debug configuration. It’s actually when you run the project that Visual Studio will build an image and start a container using that image. Let’s take a look at the output when pressing F5. I’m only showing the relevant parts here, intended for readability:

docker build -f “C:\src\MyDockerWebApp\MyDockerWebApp\Dockerfile”
                        –force-rm
                        -t mydockerwebapp:dev
                        –target base 
                       –label “com.microsoft.created-by=visual-studio”
                       –label “com.microsoft.visual-studio.project-name=MyDockerWevApp”
                       “C:\src\MyDockerWebApp”

Here you can see that Visual Studio runs a Docker build operation with the Dockerfile as input, and naming the generated image <projectname>:dev. However, there is one important parameter: –target base. This means that Visual Studio will only build the first phase, called base. This will then produce a Docker image that is just the ASP.NET Core 3.0 base image, it won’t contain any application files at all from my project!

The reason for this is that Visual Studio tries to be smart and avoid rebuilding the Docker image  every time you press F5. That would be a very slow inner loop for developers. This is called “fast” mode, and can be disabled if you always want to build the full image even in Debug mode. If you want to add something more to the image that is used in fast mode, you have to add the Docker instructions it this phase.

You can disable fast mode by adding the following to your .csproj file:

<PropertyGroup> 
    <ContainerDevelopmentMode>Regular</ContainerDevelopmentMode> 
</PropertyGroup>

If you switch to the Release configuration and run, Visual Studio will process the whole Dockerfile and generate a full image called <projectname>:latest. This is what you will do on your CI server

So, how does Visual Studio actually run the application then? Let’s look a bit further down in the output log to understand what happens:

C:\WINDOWS\System32\WindowsPowerShell\v1.0\powershell.exe -NonInteractive -NoProfile -WindowStyle Hidden -ExecutionPolicy RemoteSigned -File “C:\Users\jakobe\AppData\Local\Temp\GetVsDbg.ps1” -Version vs2017u5 -RuntimeID linux-x64 -InstallPath “C:\Users\jakobe\vsdbg\vs2017u5”
Info: Using vsdbg version ‘16.3.10904.1’
Info: Using Runtime ID ‘linux-x64’

Info: Latest version of VsDbg is present. Skipping downloads

C:\WINDOWS\System32\WindowsPowerShell\v1.0\powershell.exe -NonInteractive -NoProfile -WindowStyle Hidden -ExecutionPolicy RemoteSigned -File “C:\Users\jakobe\AppData\Local\Temp\GetVsDbg.ps1” -Version vs2017u5 -RuntimeID linux-musl-x64 -InstallPath “C:\Users\jakobe\vsdbg\vs2017u5\linux-musl-x64”

Info: Using vsdbg version ‘16.3.10904.1’

Info: Using Runtime ID ‘linux-musl-x64’

Info: Latest version of VsDbg is present. Skipping downloads

These steps downloads and executes a Powershell scripts that will in turn download and install the Visual Studio remote debugging tools to your local machine. Note that this will only happen the first time, after that it will skip the download and install as you can see from the logs above.


docker run -dt
                   -v “C:\Users\je\vsdbg\vs2017u5:/remote_debugger:rw”
                   -v “C:\src\MyDockerWebApp\MyDockerWebApp:/app”
                   -v “C:\src\MyDockerWebApp:/src”
                   -v “C:\Users\je\AppData\Roaming\Microsoft\UserSecrets:/root/.microsoft/usersecrets:ro”
                   -v “C:\Users\je\AppData\Roaming\ASP.NET\Https:/root/.aspnet/https:ro”
                   -v “C:\Users\je\.nuget\packages\:/root/.nuget/fallbackpackages2”
                   -v “C:\Program Files\dotnet\sdk\NuGetFallbackFolder:/root/.nuget/fallbackpackages”
                   -e “DOTNET_USE_POLLING_FILE_WATCHER=1”
                   -e “ASPNETCORE_ENVIRONMENT=Development”
                   -e “NUGET_PACKAGES=/root/.nuget/fallbackpackages2”
                   -e “NUGET_FALLBACK_PACKAGES=/root/.nuget/fallbackpackages;/root/.nuget/fallbackpackages2”
                   -p 50621:80 -p 44320:443
                  –entrypoint tail mydockerwebapp:dev
                  -f /dev/null

This is where Visual Studio actually starts the container, let’s examine the various (interesting) parameters:

-v “C:\Users\je\vsdbg\vs2017u5 : /remote_debugger:rw”
This mounts the path to the Visual Studio remote debugger tooling into the container. By doing this, Visual Studio can attach to the running process inside the container and you can debug the applicatoin just like you would if it was running as a normal process.

-v “C:\Users\je\vsdbg\vs2017u5 : /remote_debugger:rw”
-v “C:\src\MyDockerWebApp : /src”

These two parameters maps the project directory into the /app and /src directory of the container. This means that when the container is running,  and the web app starts, it is actually using the files from the host machine, e.g. your development machine. This ameks it possible for you to make changes to the source files and have that change immediately available in the running container

-v “C:\Users\je\AppData\Roaming\Microsoft\UserSecrets : /root/.microsoft/usersecrets:ro”
Makes the UserSecrets folder from the roaming profile folder available in the container

C:\Users\je\AppData\Roaming\ASP.NET\Https : /root/.aspnet/https:ro”
Mounts the path where the selfsigned certificates are stored, into the container

-v “C:\Users\je\.nuget\packages\ : /root/.nuget/fallbackpackages2”
-v “C:\Program Files\dotnet\sdk\NuGetFallbackFolder : /root/.nuget/fallbackpackages”

Mounts the local NuGet package cache folder and the NuGet fallback folder into the container. These files are read by the *.nuget.g.props files that are generated in the obj folder of your project

Summary

The result of this magic is that you can just run your project, make changes to it while running and have the changes immediately be applied, and also add breakpoints and debug your applications just like you are used to, even though the are running inside containers.

I hope this will shed some light on what’s going on when you are building and running Dockerized projects in Visual Studio.

Event-driven scripting in Kubernetes with Brigade

In most projects that I’ve been part of, sooner or later the need for various types of automation jobs arises. For example cleaning up old files, moving database backups, running health checks or system tests and so on.

Historically we’ve implemented these tasks using for example the Windows task scheduler, or through some custom Windows Service app. More recently, we’ve been using Azure Automation jobs for this. Sometimes it can also make sense to use CI/CD automation tools like Azure DevOps for these jobs.

With the move to containers and Kubernetes, it can make a lot of sense to use that platform not just for the business apps that you are developing, but also for these type of automation workloads. It means that you don’t have to invest and manage another platform, and you can leverage existing and 3rd part container images to build automation workflows.

Brigade

Brigade is a platform that makes it easy to create simple or complex workflows that run on Kubernetes. You use Docker containers as the basis for each step in the workflow, and wire them together using Javascript.

Brigade

Brigade is an open-source project, read more about it at:
https://brigade.sh/

Brigade runs on any vanilla Kubernetes cluster,  you don’t need anything extra installed to run brigade pipelines.

Installing Brigade is as easy as running the following two commands:

helm repo add brigade https://brigadecore.github.io/charts
helm install brigade/brigade --name brigade-server

The image below shows the main concepts in use by Brigade:image

Project
For every automation workflow that you want to implement, you will create a project. Every project has some metadata attached to it, such as id, name and so on. It also either contains or reference the Javascript code that contains the pipeline logic.

Build
A build is created every time a script is triggered, through some  external event. The build runs until all jobs are finished, and you can view the output logs from the running build as well as after it finished.

Job
Each build will contain one or more jobs. For each job, a container instance is started, and then a series of tasks is executed inside that container. You specify the jobs and the tasks in the Javascript code, and how the jobs should be scheduled.

Gateway
A gateway transform outside triggers (a Git pull request, a Trello card move etc) into events, that is passed into the pipeline where you will handle them in your code.

Brigade comes with a Generic gateway that listens and accepts POST JSON messages on any format (it also explicitly supports the CloudEvents format). In addition, there are several custom gateways that makes integration a lot easier with services such as GitHub, Docker Container Registry or Azure Event Grid.

A basic “hello-world” type of Brigade pipeline can look like this:

const { events, Job } = require("brigadier");

//Handler for exec event
events.on("exec", () =&amp;amp;amp;amp;amp;amp;amp;amp;amp;amp;amp;amp;amp;amp;gt; {

  var job = new Job("say-hello", "alpine:3.8");
  job.tasks = [
    "echo Hello",
    "echo World"
  ];

  job.run();
  
});

Here, the pipeline is triggered by the exec event, and inside that event handler it starts a new job called “say-hello” which contains two tasks where each task just prints a message. The job is executed inside a container from the alpine:3.8 image, that will be downloaded from Dockerhub and started automatically for you. Of course you can use any public image, or a private image from your own container registry.

Brigade has excellent documentation, I encourage you to read up on it more at https://docs.brigade.sh/

In this post I will show a slightly more complex example, that is taken from a recent customer project where we developed a microservice application running on Kubernetes, and found the need for some extra automation.

Removing Kubernetes environment on PR completion

Kubernetes makes it easy to create new isolated environments for your application when you need to. A common desire of many teams is to deploy the application into a fresh environment every time a pull request is created. This lets the team and stakeholders test and verify the feature that is being developed, before it gets merged into the master branch.

Using Azure DevOps, it’s quite easy to setup a release pipeline where every PR is deployed into a new namespace in Kubernetes. You can enable stages in a pipeline to be triggered by pull requests, and then use information from that PR to create a new namespace in your Kubernetes cluster and then deploy the app into that namespace.

The problem we experienced recently at a customer with this was, how can we make sure this namespace (and everything in it) is removed once the PR is complete and merged? We can’t keep it around since that will consume all the resources eventually in the cluster, and we don’t want to rely on cleaning this up manually.

This turned out to be a perfect case for Brigade. We can configure a service hook in Azure DevOps, so that every time a PR is updated we trigger a Brigade pipeline. In the pipeline we check if the PR was completed and if so, extract the relevant information from the PR and then clean up the corresponding namespace. To do this, we used existing container images that let us run helm and kubecl commands.

The Brigade script looks like this:

const { events, Job } = require("brigadier");
const util = require('util')

const HELM_VERSION = "v2.13.0"
const HELM_CONTAINER = "lachlanevenson/k8s-helm:" + HELM_VERSION;

const KUBECTL_VERSION = "v1.12.8";
const KUBECTL_CONTAINER = "lachlanevenson/k8s-kubectl:" + KUBECTL_VERSION;

events.on("simpleevent", (event, project) =&amp;amp;amp;amp;amp;amp;amp;amp;amp;gt; {
    const payload = JSON.parse(event.payload);
    const prId = payload.resource.pullRequestId;

    if (!payload.resource.sourceRefName.includes('/feature/') &amp;amp;amp;amp;amp;amp;amp;amp;amp;amp;&amp;amp;amp;amp;amp;amp;amp;amp;amp;amp; !payload.resource.sourceRefName.includes('/bug/')) {
        console.log(`The source branch ${payload.resource.sourceRefName} is not a /feature/ or /bug/ and is therefore skipped.`)
        return;
    }

    if (payload.resource.status !== "completed" &amp;amp;amp;amp;amp;amp;amp;amp;amp;amp;&amp;amp;amp;amp;amp;amp;amp;amp;amp;amp; payload.resource.status !== "abandoned") {
        console.log(`PullRequest not complete or abandoned (current status: ${payload.resource.status}).`);
        return;
    }

    var helm_job = new Job("helm-delete-release", HELM_CONTAINER);
    helm_job.env = {
        'HELM_HOST': "10.0.119.135:44134"
    };
    helm_job.tasks = ["helm init --client-only", `helm delete --purge samplewebapp-${prId}`];

    var kubectl_job = new Job("kubectl-delete-ns", KUBECTL_CONTAINER);
    kubectl_job.tasks = [`kubectl delete namespace samplewebapp-${prId}`];

    console.log("==&amp;amp;amp;amp;amp;amp;amp;amp;amp;gt; Running helm_job Job")
    helm_job.run().then(helmResult =&amp;amp;amp;amp;amp;amp;amp;amp;amp;gt; {
        console.log(helmResult.toString())

        kubectl_job.run().then(kubectlResult =&amp;amp;amp;amp;amp;amp;amp;amp;amp;gt; {
            console.log(kubectlResult.toString());
        });
    })
});

events.on("error", (e) =&amp;amp;amp;amp;amp;amp;amp;amp;amp;gt; {
    console.log("Error event " + util.inspect(e, false, null))
    console.log("==&amp;amp;amp;amp;amp;amp;amp;amp;amp;gt; Event " + e.type + " caused by " + e.provider + " cause class" + e.cause + e.cause.reason)
})

events.on("after", (e) =&amp;amp;amp;amp;amp;amp;amp;amp;amp;gt; {
    console.log("After event fired " + util.inspect(e, false, null))
});
 

This code is triggered when the “simpleevent” event is triggered. This event is handled by the generic gateway in Brigade, and can be used to send any kind of information (as a json document) to your pipeline. To trigger this event, we configure a service hook in Azure DevOps for the Pull Request updated event, and point it to the generic gateway:

SNAGHTMLae0651d[4]

The full URL looks like this:

https://brigadedemo.ehn.nu/simpleevents/v1/brigade-55cbf57f7aaeb59afa1fe4d33ca6a5a635eefe060b057c423c97a0/somesecret

The URL contains the project id and the secret that were specified when creating the project. This is how external requests is authenticated and routed to the correct brigade script.

Inside the event handler we use two different container images, the first one is for running a Helm command to delete the Kubernetes deployment. Since Helm can’t delete the namespace, we need to run a second job inside another container image that contains the Kubectl tool, where we can delete the namespace by running

kubectl delete namespace samplewebapp-${prId}`

The prId variable is parsed from the PullRequest updated event coming from Azure DevOps. We use the id of the pull request to create a unique namespace (in this case pull request with id 99 will be deployed into the samplewebapp-99 namespace).

NB: You will need to make sure that the service account for brigade have enough permission to delete the namespace. Namespaces are a cluster level resource, so it requires a higher permission compared to deleting a deployment inside a namespace. 

One easy way to do this is to assign a cluster-admin role to the brigade service account, this is not recommended for production though.

Now, when a PR is complete, our pipeline is triggered and it will delete the deployment and then the namespace.

To view the running jobs and their output, you can either use the brigade dashboard (called Kashti) by running brig dashboard or you can install the brigade terminal which will give you a similar UI but inside your favourite console.

Here is the output from the PR job in the brigade terminal:

image

It shows that two jobs were executed in this build, and you can see the images that were used and the id of each job. To see the output of each job, just return into each job:

image

Here you can see the the output of the helm job that deletes my helm deployment for the corresponding pull request.

Summary

I encourage you to take a look at Brigade, it’s easy to get started with and you can implement all sorts of automation without having to resort to other platforms and services. And although Javascript might put some people off, the power of a real programming language (compared to some DSL language) pays off when you want to implemtent something non-trivial.

If you already are using Kubernetes, why not use it for more things than your apps!

Thanks to my colleague Tobias Lolax (https://twitter.com/Tobibben) who did the original implementation of this for our customer.

My Speaking Year 2019

When I set out my goals for 2019, one of them was to speak at new conferences. Up until 2018, I had only spoken at conferences in Sweden (like DevSum, TechDays and SweTugg). While these conferences are great, I felt that I wanted to raise the bar a bit and try to visit other conferences, including conferences abroad. And as it turned out, I reached my goal!

I thought that it would be nice to sum up my speaking year in a blog post, with some comments about each comference and a picture or two.

However I want to start this post by (once again) give a big shout out to my employer Active Solution. While I do spend a lot(!) of my spare time preparing talks and travelling to and from conferences, Active Solution is what makes all this possible by allowing me to use some of my work time for speaking and community related work, and for creating an environment at work where visiting conferences is a natural part of our core activities.

Active Solution works very strategically with regards to developer conferences and meetups. We host a lot of different meetups at our office, and we also very often sponsor and/or exhibits at the three largest conferences for Microsoft/.NET developers in Sweden (DevSum, TechDays and SweTugg, see more about these conferences below). Doing this allows us to meet face to face with a lot of developers. We also have a group of people who have a passion for sharing their knowledge through public speaking, allowing us to share experiences with each other and give feedback on each others talks, CFP’s etc.

Image
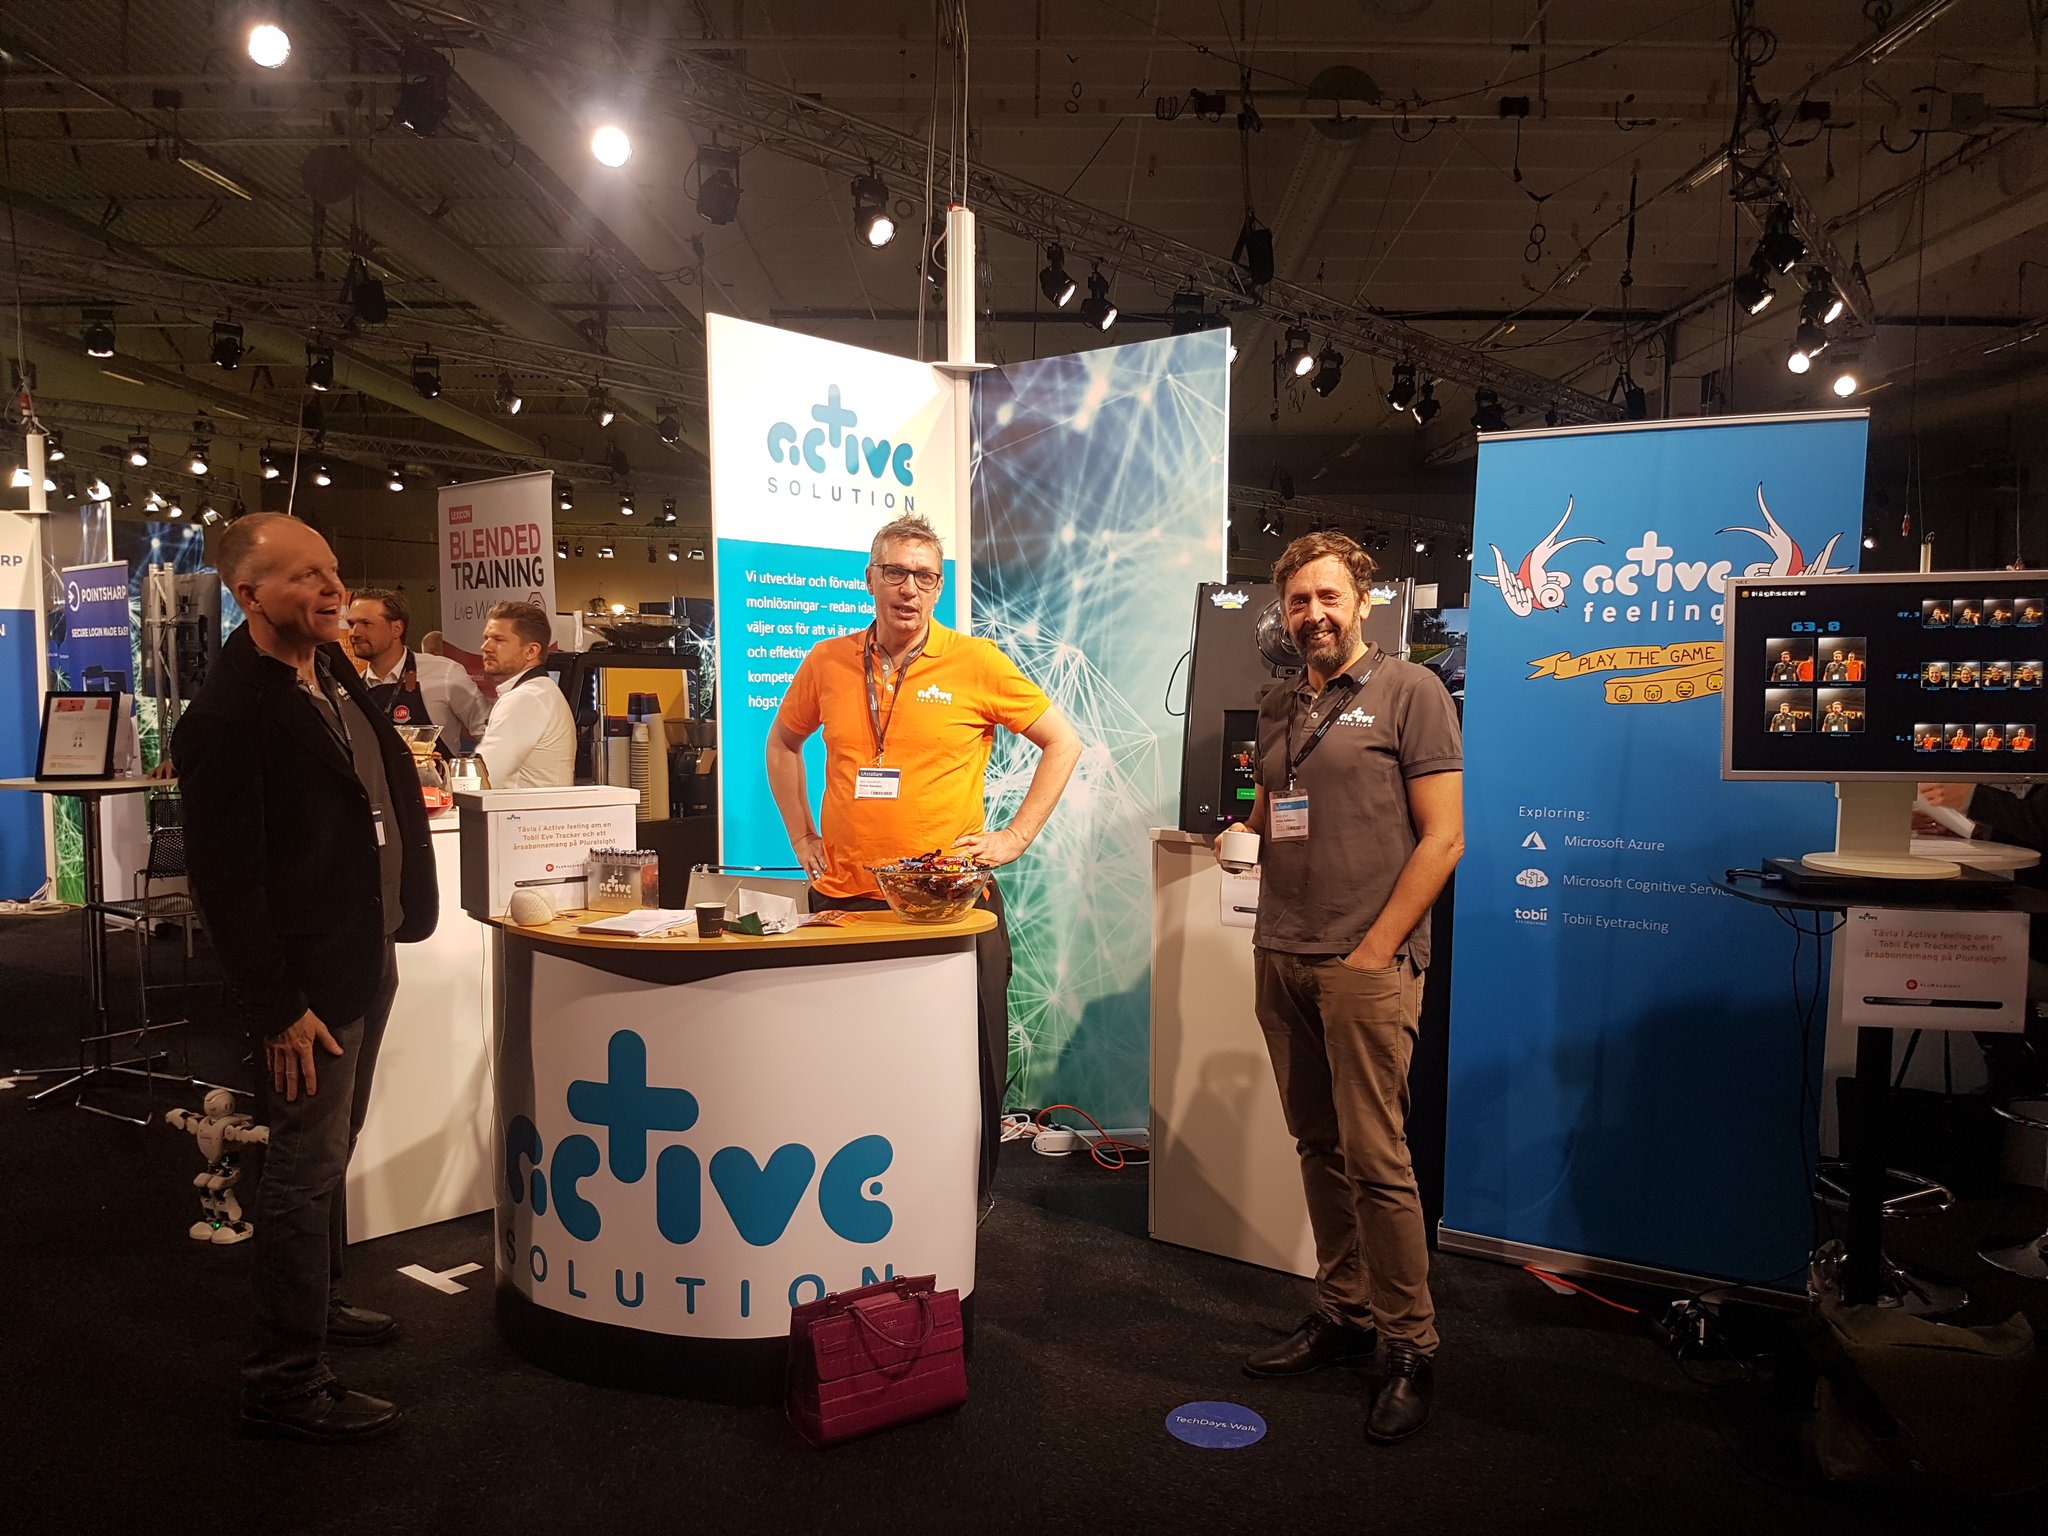
A typical Active conference booth, with competitions and nice give aways

Let’s walk through my speaking activities for 2019(not including several smaller meetup talks) for some highlights.

WinOps 2018 London

As you’ll note, this conference was actually at the end of 2018, but since it was my first conference abroad I’ll include it here Smile

WinOps is a two-day conference in London that focus on DevOps for Windows. There are a lot of DevOps conferences out there, but this is one of the few (if not the only one) with this focus. It’s not a very big conference, but I was very pleasantly surprised by the quality of the presentations that I saw, and the friendly atmosphere of the whole event.

My talk was about running Kubernetes in Azure, using Azure Kubernetes Service (AKS), and was very well received. You can tell from the questions afterwards if a talk was appreciated or not, in this case I had a lot of questions and interesting discussions afterwards.

For this conference I brought my 11-year old son Svante with me as company. He joined me for my session (not focusing too much on it though Smile ) and after the conference we stayed for two nights more in London and expored this fantastic city, where the christmas lights had just been lit up. Among other things we enjoyed a proper afternoon tea at the Dorchester hotel at Hyde Park.

winops1
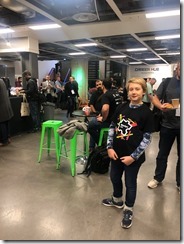
Svante in a nice WinOps t-shirt

winops2
Ready for some afternoon tea!

NDC London

Being accepted to an NDC conference has definitely been on my bucket list for some time, and finally it happened. NDC London accepted my talk “A Lap around Azure DevOps” which is basically an hour of demos, where I try to show as much as possible how team can be more productive with Azure DevOps.  Unfortunately I had some network problems, so some demoes were a bit slow but I think that overall the talk was well received and I managed to finish all the demos within the hour.

Here is a link to the recording of this session:
https://www.youtube.com/watch?v=N78NxZ-cKUc

NDC is well known for organizing great conferences and taking care of their attendees and speakers. I enjoyed hanging out with the other speakers during the conference.

ndclondon

MVP Summit (Seattle)

So, the MVP Summit is a special conference in this context since it’s not really about presenting anything but instead meeting with the product teams at Microsoft and learn and discuss current and future investments and roadmaps together with them and all the other MVP’s from around the world.

However, I did do a short presentation during the “MVP2MVP day” which is a long tradition of the ALM/DevOps MVP group, where we meet on the sunday before the summit begins, and share knowledge with each other in a packed day. Typically there are 20 minute sessions going on from 10AM to 5PM with a short lunch break, and is great fun. A big kudos here to Brian Randall and Neno Loje who are the master minds behind this day! 

Although my MVP award was recently moved from the ALM category to the Azure category, I’m still hanging out with this amazing group of people that I’ve come to know through my 8 years of being an MVP.

mvpsummit1
Celebrating TFS (mow Azure DevOps) on it’s 13th birthday Smile

mvpsummit2
During the summit I had my avatar drawn live with the one and only @reverentgeek (David Neal)

DevSum (Stockholm)

DevSum is the biggest .NET conference in Sweden, and 2019 was my 5th year in a row to speak at this conference. Active solution has been a proud sponsor at this event and we always have a nice booth where we try to combine cutting edge technologies with some  fun competitions!

This time, I did my “A Lap around Azure DevOps” talk again. It’s always nice to deliver a session more that once, it allows me to refine the presentation and make it a little bit better than last time.

Of course, things are changing so every time I redeliver a talk I end up changing both slides and demos in order to incorporate new things. This time I had no Internet problems so all the demos went as planned!

devsum

Ignite Tour Stockholm

208/2019 saw the first edition of Ignite The Tour running around the world. Microsoft took their big Ignite conference in tour, together with speakers from Microsoft and also local community speakers on each location. I submitted a couple of talks to Ignite Tour in Stockholm and got two talks accepted:

Continuous Delivery with Azure Kubernetes Service
In this talk I showed how to implemented CD techniques like A/B and Canary testing using Kubernetes and AKS.

Keeping your builds green using Docker
This talk was based on work that I’ve been doing for my current customes during the last year, where we have used Docker as the basis for the build environment. Instead of relying on manually patched servers with flaky behaviour, we moved everything to Docker which gives as Infrastructure as code and full isolation which is great when you want to have fully repeatable builds. I also talked about and showed how you can use Docker for building your applications, which has several advantages.

ignite2
Talking about Kubernetes and AKS

ignite1
Using Docker for build automation

NDC Sydney

Without a doubt, the biggest thing for me last year was being accepted to NDC Sydney. Travelling to Australia is something that I always wanted to do, so having this opportunity was nothing but amazing. Of course, trafelling to Sydney from Stockholm is a VERY long trip, so I made sure to add some vacation before and after the conference so that I was able to explore the beatiful city of Sydney.

Of course, following the news on the fires in Australia and around Sydney these last couple of months has been very painful to watch, probably even more so since I visited it so recently.

At the conference, I delivered once again delivered the “Keeping your builds green using Docker” talk, which went very well.

Here is a link to the recording:
https://www.youtube.com/watch?v=ekNSwDS1ya4

sydney1
Visiting friend and fellow MVP Adam Cogan and his wife Anastasia over at Coogee beach

sydney2
A mandatory shot of the Opera house in the Sydney harbour

sydney4

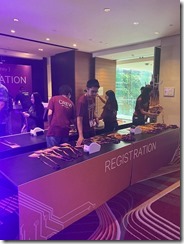
Registration opens at NDC, which

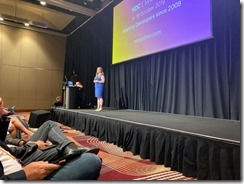
sydney5Heather Downing opened the conference with a keynote on how to treat and motivate your software engineers

sydney6The (in)famous PubConf was held on friday night after the NDC conference ended


Beautiful night skyline of Sydney

TechDays Sweden

Another big Microsoft conference in Sweden is TechDays Sweden, which celebrated 10 years in 2019. TechDays is a big conference with almost 2000 participants. Usually there is around 10 different tracks with a mixture of IT/Operations and Developer tracks.

This time, I coordinated a bit with my colleague Chris Klug (@zerokoll). Since we are both working with and speaking a lot about Docker and Kubernetes, we decided to make sure that our sessions didn’t overlap but instead built on each other. So Chris did a session that introduced Kubernetes for developers, and I did a session about “DevOps with Azure Kubernetes Service”, where I showed how to setup a CI/CD pipeline, how to make sure that your AKS cluster and applications are secure , compliant and highly available.

techdays1
Waiting for everyone to take their seat

UpdateConf (Prague)

The Czech Republic is a country that I had never visited before, so I was very glad when I was accepted to speak at this conference in Prague. Unfortunately, as it turned I had to rearrange my travels a bit so I didn’t really have any time to visit the city so I sure hope to come back again!

At UpdateConf, I delivered a new session that is called “Event-driven computing with Kubernetes”, where I talk about some open source tooling that let’s you implement event-based automation and scaling, Brigade and Keda. 

prag1
My colleague Cecilia Wiren (@ceciliasharp) about to start one of her sessions

prag2Me speaking about Brigade and Keda

prag3
Action pic Smile

CloudBrew (Mechelen, Belgium)

The last conference of the year for me was CloudBrew. I have heard so many good things about this community conference over the years so I was naturally thrilled when I was accepted to speak at this conference. And all the good things I heard turned out to be true, or better. The conference has grown a lot over the years, this year there were around 400 attendees which was twice as much as the year before. The crew from the Belgian Azure user group (AZUG) does an amazing job with this conference, everything worked flawlessly and I met a lot of new people at this conference, all with a passion for Azure in common.

I delivered the session about event-driven computing with Kubernetes again, this time with no other than Clemens Vasters in the audience, who of course is the father of the Messaging services in Azure. He has recently been involved in the work around Keda and cloud events which I covered in this talk.

cloudbrew3Alex Mangs opened the conference with a keynote looking at the future of Azure

cloudbrew2
Time to talk about Brigade and Keda again

cloudbrew4
My colleague Alan Smith preparing for his session

cloudbrew1
A great speaker dinner with both old a new friends

Summary

From a speaker perspective 2019 was an amazing year where I experienced so much and met so many new people. I can only hope that 2020 will bring some of the same experiences for me.

As with everything else, the more you prepare and speak at conferences the better you will become. For me, public speaking doesn’t really come naturally but I do feel that I have improved it over the years. 

I keep my list of upcoming (and past) speaking engagements updated here:
https://blog.ehn.nu/speaking/

Hope to see you at a conference soon!

Getting started with Windows Containers in Azure Kubernetes Service

Many of us have eagerly been waiting for the announcement that Microsoft made at the Build 2019 conference, Windows Containers is now in public preview in Azure Kubernetes Service! Yes, it’s in preview so we still have to wait before putting applications into production but it is definitely time to start planning and testing migrations of your Windows applications to AKS, such as full .NET Framework apps.

Containers on Windows are still not as mature as on Linux of course, but they are fully supported on Windows and it is now GA on Kubernetes since version 1.14.

NB: Read about the current limitations for Windows Server nodes pools and application workloads in AKS here
https://docs.microsoft.com/en-us//azure/aks/windows-node-limitations

In this introductory post, I will show how to create a new AKS cluster with a Windows node and then deploy an application to the cluster using Helm.

Enabling AKS Preview Features

If AKS is still in preview when you are reading this, you first need to enable the preview features before you can create a cluster with Windows nodes:

az extension add –name aks-preview

az feature register –name WindowsPreview –namespace Microsoft.ContainerService


The operation will take a while until it is completed, you can check the status by running the following command:

az feature list -o table –query “[?contains(name, ‘Microsoft.ContainerService/WindowsPreview’)].{Name:name,State:properties.state}”


When the registration state is Registered, run the following command to refresh it:

az provider register –namespace Microsoft.ContainerService

Creating an AKS Cluster with Windows nodes

When the registration of the preview feature have been completed, you can go ahead and create a cluster. Here, I’m creating a 1 node cluster since it will only be used for demo purposes. Note that it is currently not possible to create an all Windows node cluster, you have to create at least one Linux node. It is also necessary to use a network policy that uses Azure CNI .

The below command creates a one node cluster with the Azure CNI network policy, and specifies the credentials for the Windows nodesm, should you need to login to these machines. Replace <MY_PASSWORD> with your own strong password.

(Note that the commands below is executed in a Bash shell):


az group create –name k8s –location westeurope


az aks create \
    –resource-group k8s \
    –name k8s \
    –node-count 1 \
    –enable-addons monitoring \
    –kubernetes-version 1.14.0 \
    –generate-ssh-keys \
    –windows-admin-password <MY_PASSWORD> \
    –windows-admin-username azureuser \
    –enable-vmss \
    –network-plugin azure


Now we will add a new node pool that will host our Windows nodes. for that, we use the new az aks nodepool add command. Note the os-type parameter that dictates that this node pool will be used for Windows nodes.


az aks nodepool add \
  –resource-group k8s \
  –cluster-name k8s \
  –os-type Windows \
  –name npwin \
  –node-count 1 \
  –kubernetes-version 1.14.0


When the command has completes, you should see two nodes in your cluster:

kubectl get nodes

NAME                                STATUS   ROLES   AGE   VERSION
aks-nodepool1-15123610-vmss000000   Ready    agent   8d    v1.14.0
aksnpwin000000                      Ready    agent   8d    v1.14.0


Installing Helm

Even though Helm has it’s quirks, I find it very useful for packaging and deploying kubernetes applications. A new major version is currently being worked on, which will (hopefully) remove some of the major issues that exists in the current version of Helm.

Since Helm is not installed in a AKS cluster by default, we need to install it. Start by installing theHelm CLI, follow the instructions here for your platform:

https://helm.sh/docs/using_helm/#installing-helm


Before deploying Helm, we need to create a service account with proper permissions that will be used by Helms server components, called Tiller. Create the following file:

helm-rbac.yaml
apiVersion: v1
kind: ServiceAccount
metadata:
   name: tiller
   namespace: kube-system

apiVersion: rbac.authorization.k8s.io/v1
kind: ClusterRoleBinding
metadata:
   name: tiller
roleRef:
   apiGroup: rbac.authorization.k8s.io
   kind: ClusterRole
   name: cluster-admin
subjects:
   – kind: ServiceAccount
     name: tiller
     namespace: kube-system


Run the following command to create the service account and the cluster role binding:

kubectl apply –f helm-rbac.yaml


To deploy helm to the AKS cluster, we use the helm init command. To make sure that it ends up on a Linux node, we use the –node-selectors parameter:


helm init –service-account tiller –node-selectors “beta.kubernetes.io/os=linux”


Running helm list should just return an empty list of releases, to make sure that Helm is working properly.

Deploy an Application

Now we have an AKS cluster up and running with Helm installed, let’s deploy an application. I will once again use the QuizBox  application that me and Mathias Olausson developed for demos at conferences and workshops. To simplify the process, I have pushed the necessary images to DockerHub which means you can deploy them directly to your cluster to try this out.


The source code for the Helm chart and the application is available here: https://github.com/jakobehn/QBox


Let’s look at the interesting parts in the Helm chart. First up is the deployment of the web application. Since we are using Helm charts, we will pick the values from a separate values.yaml file at deployment time, and refer to them using the {{expression}} format.

Note also that we using the nodeSelector property here to specify that the pod should be deployed to a Windows node.


deployment-frontend.yaml

apiVersion: apps/v1beta1
kind: Deployment
metadata:
   name: frontend
spec:
   replicas: {{ .Values.frontend.replicas }}
   template:
     metadata:
       labels:
         app: qbox
         tier: frontend
     spec:
       containers:
       – name: frontend
         image: “{{ .Values.frontend.image.repository }}:{{ .Values.frontend.image.tag }}”
         ports:
         – containerPort: {{ .Values.frontend.containerPort }}
       nodeSelector:
         “beta.kubernetes.io/os”: windows


The deployment file for the backend API is pretty much identical:

deployment-backend.yaml

apiVersion: apps/v1beta1
kind: Deployment
metadata:
   name: backend
spec:
   replicas: {{ .Values.backend.replicas }}
   template:
     metadata:
       labels:
         tier: backend
     spec:
       containers:
       – name: backend
         image: “{{ .Values.backend.image.repository }}:{{ .Values.backend.image.tag }}”
         ports:
         – containerPort: {{ .Values.backend.containerPort }}
       nodeSelector:
         “beta.kubernetes.io/os”: windows 

Finally, we have the database. Here I am using SQL Server Express on Linux, mainly because there is no officially supported Docker image from Microsoft that will run on Windows Server 2019 (which is required by AKS, since it’s running Windows nodes on Windows Server 2019).

But this also hightlights a very interesting and powerful feature of Kubernetes and AKS, the ability to mix Windows and Linux nodes in the same cluster and even within the same applications! This means that the whole ecosystem of Linux container images is available for Windows developers as well.


deployment-db.yaml

apiVersion: apps/v1beta1
kind: Deployment
metadata:
   name: db
spec:
   replicas: {{ .Values.db.replicas }}
   template:
     metadata:
       labels:
         tier: db
     spec:
       containers:
       – name: db
         image: “{{ .Values.db.image.repository }}:{{ .Values.db.image.tag }}”
         ports:
         – containerPort: {{ .Values.db.containerPort }}  
         env:
         – name: ACCEPT_EULA
           value: “Y”
         – name: SA_PASSWORD
           valueFrom:
             secretKeyRef:
               name: db-storage
               key: password
       nodeSelector:
         “beta.kubernetes.io/os”: linux 


To deploy the application, navigate to the root directory of the helm chart (where the Values.yaml file is located) and run:

helm upgrade –install quizbox . –values .\values.yaml

This will build and deploy the Helm chart and name the release “quizbox”. Running helm status quizbox shows the status of the deployment:

helm status quizbox

LAST DEPLOYED: Fri Jun 28 14:52:15 2019
NAMESPACE: default
STATUS: DEPLOYED

RESOURCES:
==> v1beta1/Deployment
NAME      DESIRED  CURRENT  UP-TO-DATE  AVAILABLE  AGE
backend   1        1        1           0          9s
db        1        1        1           1          9s
frontend  1        1        1           0          9s

==> v1/Pod(related)
NAME                      READY  STATUS             RESTARTS  AGE
backend-69fd59c947-77tm4  0/1    ContainerCreating  0         9s
db-74dfcdcbff-79zsp       1/1    Running            0         9s
frontend-89d4b5b4b-rqw4q  0/1    ContainerCreating  0         9s

==> v1/Secret
NAME        TYPE    DATA  AGE
db-storage  Opaque  1     10s

==> v1/Service
NAME      TYPE          CLUSTER-IP    EXTERNAL-IP  PORT(S)       AGE
qboxdb    ClusterIP     10.0.153.253  <none>       1433/TCP      9s
frontend  LoadBalancer  10.0.132.46   <pending>    80:32608/TCP  9s
qboxapi   ClusterIP     10.0.235.72   <none>       80/TCP        9s


NOTES:
Helm chart for QuizBox deployed successfully!


Wait until the status of all pods are Running and until you see an EXTERNAL-IP address for the frontend service:

image


Open a browser and navigate to the exernal IP address, in a few seconds you should see the QuizBox application running:

image


This was a very simple walkthrough on how to get started with Windows applications on Azure Kubernetes Service. Hope you found it useful, and stay tuned for more blog posts on AKS and Windows in the near future!


Running Windows Container Build Agents for Azure Pipelines

In a previous post I talked about how to create a build environment, including an Azure DevOps build agent, using Docker and Windows Containers. Using Dockerfiles, we can specify everything that we need in order to build and test our projects. Docker gives us Infrastructure as Code (no more snowflake build servers) and isolation which makes it easy to spin up multiple agents quickly on one or more machines without interfering with each other.

What I didn’t talk about in that post is to actually depoy and run the Windows containers in a production environment. I showed how to start the agent using docker run, but for running build agents for production workloads, you need something more stable and maintainable. There are also some additional aspects that you will need to handle when running build agents in containers.

For hosting and orchestrating Windows containers there are a few different options:

  • Using Docker Compose
  • Docker Swarm
  • Kubernetes (which recently announced General Availability for running Windows Containers)

In this post I will show how to use Docker Compose to run the builds agents. In an upcoming post, I will use Azure Kubernetes services to run Windows container builds agents on multiple machines in the cloud (Support for Windows containers is currently in preview: https://docs.microsoft.com/en-us/azure/aks/windows-container-cli).

In addition to selecting the container hosting, there are some details that we want to get right:

  • Externalize build agent working directory
    We want to make sure that the working directory of the build agents is mapped to outside of the container. Otherwise we will loose all state when an agent is restarted, making all subsequent builds slower

  • Enable “Docker in docker”
    Of course we want our build agent to be able to build Dockerfiles. While it is technically possible to install and run Docker engine inside a Docker container, it is not recommended. Instead, we install the Docker CLI in the container and use Named Pipes to bind the Docker API from the host. That means that all containers running on the host will share the same Docker engine. An advantage of this is that they will all benefit from the Docker image and build cache, improving build times overall, and reducing the amount of disk space needed

  • Identity
    When accessing resources outside the container, the build agent will almost always need to authenticate against that resource. This could be for example a custom NuGet feed, or a network share. A Windows container can’t be domain joined, but we can use group Managed Service Accounts (gMSA) which is a special type of service account introduced in Windows Server 2012 designed to allow multiple computers to share an identity without needing to know its password.

    You can follow this post from Microsoft on how to create and use group Managed Service Accounts for Windows containers:
    https://docs.microsoft.com/en-us/virtualization/windowscontainers/manage-containers/manage-serviceaccounts

    This post assumes that you have created a gMSA called msa_BuildAgent .

Docker Compose

Docker compose makes it easy to start and stop multiple containers on a single host. All information is defined in a docker-compose.yml file, and then we can start everything using a simple docker-compose up command, and then docker-compose down to stop all containers, tearing down networks and so on.

We need to send in multiple parameters when starting the build agent containers, and to avoid making the docker-compose file too complex, we can extract all parameters to an external file. This also makes it easy to tokenize it when we run this from an automated process.


docker-compose.yml

version: ‘2.4’
services:
  agent1:
     image: ${IMAGE}:${VERSION}
     volumes:
       – type: npipe
         source: \\.\pipe\docker_engine
         target: \\.\pipe\docker_engine       
       – type: bind
         source: d:\w\${WORKFOLDERNAME}1
         target: c:\setup\_work
     env_file: .env
     environment:
       TFS_AGENT_NAME: ${AGENTNAME}-1
     restart: always
  agent2:
     image: ${IMAGE}:${VERSION}
     volumes:
       – type: npipe
         source: \\.\pipe\docker_engine
         target: \\.\pipe\docker_engine       
       – type: bind      
         source: d:\w\${WORKFOLDERNAME}2
         target: c:\agent\_work
     env_file: .env
     environment:
       TFS_AGENT_NAME: ${AGENTNAME}-2
     restart: always           

As you can see, this file defines two containers (agent1 and agent2), you can easily add more here if you want to.

Some comments on this file:

  • To enable “Docker in Docker”, we use the volume mapping of type npipe, which stands for named pipes. This binds to the Docker API running on the host
  • An addition volume is defined that maps c:\agent\_work to the defined path on the container host
  • We specify restart: always to make sure that these containers are restarted in case the build server is restarted

All values for the variables will be taken from an environment file (the env_file argument), that looks like this:

.env (env_file)

TFS_URL=<ORGANIZATIONURL>
TFS_PAT=<PERSONALACCESSTOKEN>
TFS_POOL_NAME=<AGENTPOOLNAME>
IMAGE=<BUILAGENTIMAGENAME>
VERSION=<BUILDAGENTIMAGETAG>
AGENTNAME=<CONTAINERNAME>
WORKFOLDERNAME=<WORKFOLDERNAME>
CREDENTIALSPEC=file://msa_BuildAgent.json

This file is placed in the same folder as the docker-compose.yml file.

Most of these parameters were covered in the previous post, the new ones here though are:

  • WORKFOLDERNAME
    This is the path on the container host where the working directory should be mapped to. Internally in the container, the work directory in the agent is set to c:\agent\_work

  • CREDENTIALSPEC
    This is the name of the credential specification file that you created if you followed the post that I linked to above, when creating the group Managed Service Account. That file is placed in the c:\ProgramData\Docker\CredentialSpec folder on your host

To start these build agents you simply run the following command in the same directory where you places the docker-compose.yml and the .env files:

docker-compose up –d

When you run this command, you will see something like:

Creating network “build_default” with the default driver
Creating build_agent1_1 …
Creating build_agent2_1 …
Creating build_agent1_1 … done
Creating build_agent2_1 … done

To stop all the containers, including tearing down the network that was created you run :

docker-compose down

Automating the process

The process of deploying and updating builds agent containers on a server should of course be automated. So we need something that runs on our build servers that can pull the build agent container images from a container registry, and then start the agents on that machine.

One way to do this with Azure DevOps is to use Deployment Groups, which let you run deployments on multiple machines either sequentially or in parallell. 

Here is an image that shows what this could look like:

image

Here I have two build servers running Windows Server 2019 Core. The only things that are installed on these servers are Docker, Docker Compose and a Deployment Group agent. The deployment group agent will be used to stop the build agent containers, pull a new verison of the build agent image and then start them up again.

Here is the deployment process in Azure Pipelines:

image

The process work like this:

  1. The image version is updating by modifying the .env file that we defined before with the build number of the current build

  2. We run Docker login to authenticate to the container registry where we have the build agent container image. In this case we are using Azure Container Reigstry, but any registry will do

  3. The new version of the image is then pulled from the registry. This can take a while (Windows Containers are big) but usually only a few small layers need to be pulled after you have pulled the initial image the first time

  4. When we have the new image locally, we shut down the agents by running docker-compose down

  5. And finally, we start the agents up again by running docker-compose up –d

Deployment groups are powerful in that they let you specify how to roll out new deployments oacross multiple servers.

If you do not want to restart all of your build agents at the same time, you can specify thise in the settings of the deployment group job:

image

Note: One thing that is not handled by this process is graceful shutdown, e.g. if a build is currently running it will be stopped when shutting down the agents. It would be fully possible to utilize the Azure Pipelines API to first disable all agents (to prevent new builds from starting) and then wat until any currently running builds have finished, before shutting them down. I just haven’t done that yet Smile

Hopefully this post was helpful if you want to run Windoes Continaer build agents for Azure Pipelines on your servers!

Accessing Azure Artifacts feed in a Docker build

I’ve recently given talks at conferences and user groups on the topic of using Docker as a build engine, describing the builds using a Dockerfile. This has several advantages, such as fully consistent build no matter where you run it, no dependencies necessary except Docker.

Image result for docker

Some things become a bit tricker though, I’ve blogged previously about how to run unit tests in a Docker build, including getting the test results out of the build container afterwards.

Another thing that you will soon hit if you start with Dockerfile builds, is how to restore packages from an authenticated NuGet feed, such as Azure Artifacts. The reason this is problematic is that the build will run inside a docker container, as a Docker user that can’t authenticate to anything by default. If you build a projects that references a package located in an Azure Artifacts feed, you’ll get an error like this:

Step 4/15 : RUN dotnet restore -s “https://pkgs.dev.azure.com/jakob/_packaging/DockerBuilds/nuget/v3/index.json” -s “https://api.nuget.org/v3/index.json” “WebApplication1/WebApplication1.csproj”
—> Running in 7071b05e2065
/usr/share/dotnet/sdk/2.2.202/NuGet.targets(119,5): error : Unable to load the service index for source
https://pkgs.dev.azure.com/jakob/_packaging/DockerBuilds/nuget/v3/index.json. [/src/WebApplication1/WebApplication1.csproj]
/usr/share/dotnet/sdk/2.2.202/NuGet.targets(119,5): error :   Response status code does not indicate success: 401 (Unauthorized). [/src/WebApplication1/WebApplication1.csproj]
The command ‘/bin/sh -c dotnet restore -s “
https://pkgs.dev.azure.com/jakob/_packaging/DockerBuilds/nuget/v3/index.json” -s “https://api.nuget.org/v3/index.json” “WebApplication1/WebApplication1.csproj”‘ returned a non-zero code: 1

The output log above shows a 401 (Unauthorized) when we run a dotnet restore command.

Using the Azure Artifacts Credential Provider in a Dockerfile

Image result for azure artifacts

To solve this, Microsoft supplies a credential provider for Azure Artifacts, that you can find here https://github.com/microsoft/artifacts-credprovider

NuGet wil look for installed credential providers and, depending on context, either prompt the user for credentials and store it in the credential manager of the current OS, or for CI scenarios we need to pass in the necessary informtion and the credential provider will then automatically do the authentication.

To use the credential provider in a Dockerfile build, you need to download and configure it, and also be sure to specify the feed when you restore your projects. Here is snippet from a Dockerfile that does just this:

NB: The full source code is available here https://dev.azure.com/jakob/dockerbuilds/_git/DockerBuilds?path=%2F4.%20NugetRestore&version=GBmaster

# Install Credential Provider and set env variables to enable Nuget restore with auth

ARG PAT
RUN wget -qO- https://raw.githubusercontent.com/Microsoft/artifacts-credprovider/master/helpers/installcredprovider.sh | bash
ENV NUGET_CREDENTIALPROVIDER_SESSIONTOKENCACHE_ENABLED true
ENV VSS_NUGET_EXTERNAL_FEED_ENDPOINTS “{\”endpointCredentials\”: [{\”endpoint\”:\”https://pkgs.dev.azure.com/jakob/_packaging/DockerBuilds/nuget/v3/index.json\”, \”password\”:\”${PAT}\”}]}”

# Restore packages using authenticated feed
COPY [“WebApplication1/WebApplication1.csproj”, “WebApplication1/”]
RUN dotnet restore -s “https://pkgs.dev.azure.com/jakob/_packaging/DockerBuilds/nuget/v3/index.json” -s “https://api.nuget.org/v3/index.json” “WebApplication1/WebApplication1.csproj”

The  VSS_NUGET_EXTERNAL_FEED_ENDPOINTS  is an environment variable that should contain the endpoint credentials for any feed that you need to authenticate against, in a JSON Format. The personal access token is sent to the Dockerfile build using an argument called PAT.

To build this, create a Personal Access Token in your Azure DevOps account, with permissions to read your feeds, then run the following command:

docker build -f WebApplication1\Dockerfile -t meetup/demo4 . –build-arg PAT=<token>

You should now see the restore complete successfully

Creating a Windows Container Build Agent for Azure Pipelines

Having automated builds that are stable and predictable is so important in order to succeed with CI/CD. One important practice to enable this is to have a fully scriptable build environment that lets you deploy multiple, identical, build envionment hosts. This can be done by using image tooling such as Packer from HahsiCorp. Another option is to use Docker which is what I am using in this post.

Using Docker will will crete a Dockerfile that specifies the content of the image in which builds will run. This image should contain the SDK’s and tooling necessary to build and test your projects. It will also contain the build agent for your favourite CI server that will let you spin up a new agent in seconds using the docker image.


In this post I will walk you through how to create a Windows container image for Azure Pipelines/Azure DevOps Server that contains the necessary build tools for building .NET Framework and .NET Core projects.

I am using Windows containers here because I want to be able to build full .NET Framework projects (in addition to .NET core of course). If you only use .NET Core things are much simpler, there is even an existing Docker image from Microsoft thath contains the build agent here: https://hub.docker.com/r/microsoft/vsts-agent/


All files referred to in this blog post are available over at GitHub:
https://github.com/jakobehn/WindowsContainerBuildImage


Prerequisites:

You need to have Docker Desktop install on your machine to build the image.

I also recommend using Visual Studio Code with the Docker extension installed for authoring Dockerfiles (see https://code.visualstudio.com/docs/azure/docker)

Specifying the base image

All Docker images must inherit from a base image. In this case we will start with one of the images from Microsoft that ships with the full .NET Framework  SDK, microsoft/dotnet-framework.

If you have the Docker extension in VS Code installed, you can browse existing images and tags directly from the editor:

image

I’m going to use the image with .NET Framework 4.7.2 SDK installed running in Windows Server Core:

image

Installing Visual Studio Build Tools

In order to build .NET Framework apps we need to have the proper build tools installed. Installing Visual Studio in a Docker container is possible but not recommended. Instead we can install Visual Studio Build Tools, and select wich components to install.

To understand which components that are available and which identifer they have, this page is very userful. It contains all available components that you can install in Visual Studio Build Tools 2017:
https://docs.microsoft.com/en-us/visualstudio/install/workload-component-id-vs-build-tools?view=vs-2017

In the lines shown below, I’m first downloading and installing Visual Studio Log Collection tool (vscollect) that let’s us capture the installation log. Then we download the build tools from the Visual Studio 2017 release channel feed.

Finally we are instaling the build tools in quiet mode,specifying the desired components. Of course you might wamt to change this list to fit your needs.

image

Installing additional tooling

You will most likely want to install additional tooling, besides the standard VS build tools. In my case, I want to install Node, the latest version of NET Core SDK and also web deploy. Many of these things can be installed easily using chocolatey, as shown below:

image

Installing .NET Core SDK can be done by simply downloading it and extract it and update the PATH environment variable:

image

Installing and configuring the Azure Pipelines Build Agent

Finally we want to installl the Azure Pipelines build agent and configure it. Installing the agent will be done when we are building the Docker image. Configuring it against your Azure DevOps organization must be done when starting the image, which means will do this in the CMD part of the Dockerfile, and supply the necessary parameters.

image

The InstallAgent.ps1 script simply extracts the downloaded agent :

image

ConfigureAgent.ps1 will be executed when the container is started, and here we are using the unattended install option for the Azure Pipelines agent to configure it against an Azure DevOps organization:

image

Building the Docker image

To build the image from the Dockerfile, run the following command:

docker build -t mybuildagent:1.0 -m 8GB .

I’m allocating 8GB of memory here to make sure the installation process won’t be too slow. In particular installing the build tools is pretty slow (around 20 minutes on my machine) and I’ve found that allocating more memory speeds it up a bit. As always, Docker caches all image layers so if you make a change to the Docker file, the build will go much faster the next time (unless you change the command that installs the build tools Smile

When the build is done you can run docker images to see your image.

Running the build agent

To start the image and connect it to your Azure DevOps organization, run the following command:

docker run -d -m 4GB –name <NAME> –storage-opt “size=100GB” -e TFS_URL=<ORGANIZATIONURL>-e TFS_PAT=<PAT> -e TFS_POOL_NAME=<POOL> -e TFS_AGENT_NAME=<NAME> mybuildagent:1.0

Replace the parameters in the above string:

  • NAME
    Name of the builds agent as it is registered in the build pool in Azure DevOps. Also the docker container will use the same name, which can be handy whe you are running multiple agents on the same host
  • ORGANIZATIONURL
    URL to your Azure DevOps account, e.g. https://dev.azure.com/contoso
  • PAT
    A personal access token that you need to crete in your Azure DevOps organization Make sure that the token has the AgentPools (read, manage) scope enabled
  • POOL
    The name of the agent pool in Azure DevOps that the agent should register in

When you run the agent from command line you will see the id of the started Docker container. For troubleshooting you can run docker logs <id> to see the output from the build agent running in the container

image

After around 30 seconds or so, you should see the agent appear in the list of available agents in your agent pool:

image

Happy building!

Deploy Azure Web App for Containers with ARM and Azure DevOps

Using Docker containers  for building and running your applications has many advantages such as consistent builds, build-once run anywhere and easy standardized packaging and deployment format, just to name a few.

When it comes to running the containers you might look into container orchestrators such as Kubernetes or Docker Swarm. Sometimes though, these orchestrators can be overkill for your applications. If you are developing web applications that have only a few dependent runtime components, another options is to use Azure Web App for Containers, which is a mouthful for saying that you can use your beloved Azure Web Apps with all the functionality that comes with it (easy scaling, SSL support etc), but deploy your code in a container. Best of both worlds, perhaps?

In this post I will show how you can create an ARM template that creates the Azure Web App with the necessary setting to connect it to an Azure Container Registry, and how you setup a Azure Pipeline to build and deploy the container.

The code for this blog post is available on GitHub:

https://github.com/jakobehn/containerwebapp

The release definition is available here:
https://dev.azure.com/jakob/blog

Prerequisites

  • An Azure subscription (duh)
  • An Azure Container Registry
  • An Azure DevOps project

Creating the ARM Template

First up is creating an ARM template that will deploy the web app resource to your Azure subscription. Creating an ARM template for a web app is easy, you can use the Azure Resource Group project in Visual Studio (this template is installed with the Azure SDK) and select the Web app template:

image_thumb1 


Now, we need to make some changes in order to deploy this web app as a container. FIrst of all we will change some settings of the App Service Plan.

Set the “kind” property to “linux”, to specify that this is a Linux hosted web app (Windows containers for Web Apps are in preview at the moment).

Then we also need to set the “reserved” property to true (The documentation just says: ‘If Linux app service plan true, false otherwise’ Smile )

{
   “apiVersion”: “2015-08-01”,
   “name”: “[parameters(‘hostingPlanName’)]”,
   “type”: “Microsoft.Web/serverfarms”,
   “location”: “[resourceGroup().location]”,
   “kind”:  “linux”,
   “tags”: {
     “displayName”: “HostingPlan”
   },
   “sku”: {
     “name”: “[parameters(‘skuName’)]”,
     “capacity”: “[parameters(‘skuCapacity’)]”
   },
   “properties”: {
     “name”: “[parameters(‘hostingPlanName’)]”,
     “reserved”: true
   }
},

For the web app definition, we need to set the “kind” property to “app,linux,container” to make this a containerized web app resource. We also need to set the DOCKER_CUSTOM_IMAGE_NAME to something. We will set the correct image later on from our deployment pipeline, but this property must be here when we create the web app resource.

{
   “apiVersion”: “2015-08-01”,
   “name”: “[variables(‘webSiteName’)]”,
   “type”: “Microsoft.Web/sites”,
   “kind”: “app,linux,container”,
   “location”: “[resourceGroup().location]”,
   “tags”: {
     “[concat(‘hidden-related:’, resourceGroup().id, ‘/providers/Microsoft.Web/serverfarms/’, parameters(‘hostingPlanName’))]”: “Resource”,
     “displayName”: “Website”
   },
   “dependsOn”: [
     “[resourceId(‘Microsoft.Web/serverfarms/’, parameters(‘hostingPlanName’))]”
   ],
   “properties”: {
     “name”: “[variables(‘webSiteName’)]”,
     “serverFarmId”: “[resourceId(‘Microsoft.Web/serverfarms’, parameters(‘hostingPlanName’))]”,
     “siteConfig”: {
       “DOCKER_CUSTOM_IMAGE_NAME”: “containerwebapp”
     }
   }
},

Again, the full source is available over att GitHub (see link at top)

Azure Pipeline

Let’s create a deployment pipeline that will build and push the image, and then deploy the ARM template and finally the web app container.

First up is the build definition, here I’m using YAML since it let’s me store the build definition in source control together with the rest of the application:

NB: You need to change the azureSubscriptionEndpoint and azureContainerRegistry to the name of your service endpoint and Azure container registry


azure-pipelines.yml

name: 1.0$(rev:.r)

trigger:

  – master

pool:

  vmImage: ‘Ubuntu-16.04’

steps:

  – task: Docker@1

    displayName: ‘Build image’

    inputs:

      azureSubscriptionEndpoint: ‘Azure Sponsorship’

      azureContainerRegistry: jakob.azurecr.io

      dockerFile: ContainerWebApp/Dockerfile

      useDefaultContext: false

      imageName: ‘containerwebapp:$(Build.BuildNumber)’

  – task: Docker@1

    displayName: ‘Push image’

    inputs:

      azureSubscriptionEndpoint: ‘Azure Sponsorship’

      azureContainerRegistry: jakob.azurecr.io

      command: ‘Push an image’

      imageName: ‘containerwebapp:$(Build.BuildNumber)’

  – task: PublishBuildArtifacts@1

    displayName: ‘Publish ARM template’

    inputs:

      PathtoPublish: ‘ContainerWebApp.ResourceGroup’

      ArtifactName: template

The build definition performs the following steps:

  1. Build the container image using the Docker task, where we point to the Dockerfile and give it an imagename
  2. Pushes the container image to Azure Container Registry
  3. Publishes the content of the Azure resource group project back to Azure Pipelines. This will be used when we deploy the resource group in the release definition

Running this buid should push an image to your container registry.

Now we will create a release definition that deployes the resource group and then the container web app.

First up is the resource group deployment. Here we use the Azure Resource Group Deployment task, where we point to the ARM template json file and the parameters file. We also override the name of the app hosting plan since that is an input parameter to the template.

image

Then we use the Azure App Service Deployment task to deploy the container to the web app. Note that we are using the preview 4.* version since that has support for deploying to Web App for Containers.

image

In the rest of the parameters for this task we specify the name of the container registry, the name of the image and the specific tag that we want to deploy. The tag is fetched from the build number of the associated build.

Finally we set the following app settings:

  • DOCKER_REGISTRY_SERVER_URL:                 The URL to the Docker registry
  • DOCKER_REGISTRY_SERVER_USERNAME:   The login to the registry. For ACR, this is the name of the registry
  • DOCKER_REGISTRY_SERVER_PASSWORD:   The password to the registry. For ACR, you can get this in the Access Keys blade in the Azure portal

image

That’s it. Running the release deployes the resource group (will take 1-2 minutes the first time) and then the container to the web app. Once done, you can browse the site and verify that it works as expected:

image