TFS 2012 introduces a new type of Lab environment called Standard Environment. This allows you to setup a full Build Deploy Test (BDT) workflow that will build your application, deploy it to your target machine(s) and then run a set of tests on that server to verify the deployment. In TFS 2010, you had to use System Center Virtual Machine Manager and involve half of your IT department to get going. Now all you need is a server (virtual or physical) where you want to deploy and test your application. You don’t even have to install a test agent on the machine, TFS 2012 will do this for you!
Although each step is rather simple, the entire process of setting it up consists of a bunch of steps. So I thought that it could be useful to run through a typical setup.I will also link to some good guidance from MSDN on each topic.
High Level Steps
- Install and configure Visual Studio 2012 Test Controller on Target Server
- Create Standard Environment
- Create Test Plan with Test Case
- Run Test Case
- Create Coded UI Test from Test Case
- Associate Coded UI Test with Test Case
- Create Build Definition using LabDefaultTemplate
1. Install and Configure Visual Studio 2012 Test Controller on Target Server
First of all, note that you do not have to have the Test Controller running on the target server. It can be running on another server, as long as the Test Agent can communicate with the test controller and the test controller can communicate with the TFS server. If you have several machines in your environment (web server, database server etc..), the test controller can be installed either on one of those machines or on a dedicated machine.
To install the test controller, simply mount the Visual Studio Agents media on the server and browse to the vstf_controller.exe file located in the TestController folder.
Run through the installation, you might need to reboot the server since it installs .NET 4.5.
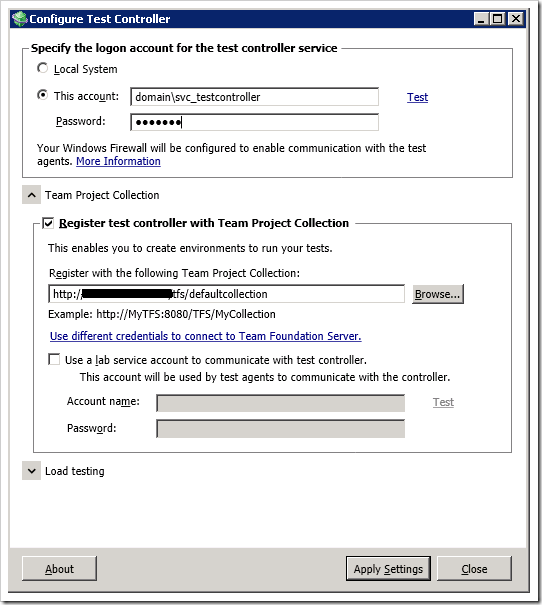
When the test controller is installed, the Test Controller configuration tool will launch automatically (if it doesn’t, you can start it from the Start menu). Here you will supply the credentials of the account running the test controller service. Note that this account will be given the necessary permissions in TFS during the configuration. Make sure that you have entered a valid account by pressing the Test link.
Also, you have to register the test controller with the TFS collection where your test plan is located (and usually the code base of course)
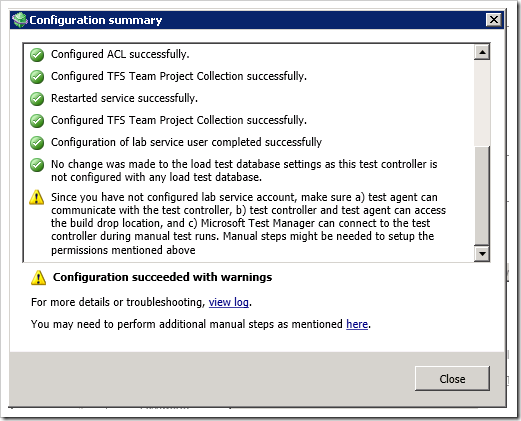
When you press Apply Settings, all the configuration will be done. You might get some warnings at the end, that might or might not cause a problem later. Be sure to read them carefully.
For more information about configuring your test controllers, see Setting Up Test Controllers and Test Agents to Manage Tests with Visual Studio
2. Create Standard Environment
Now you need to create a Lab environment in Microsoft Test Manager. Since we are using an existing physical or virtual machine we will create a Standard Environment.
- Open MTM and go to Lab Center.
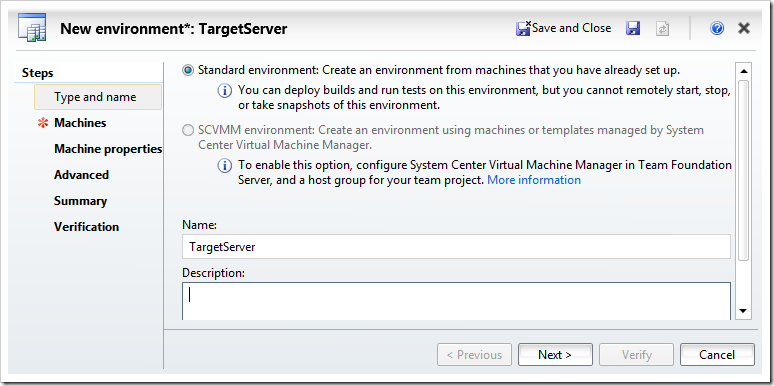
- Click New to create a new environment
- Enter a name for the environment. Since this environment will only contain one machine, we will use the machine name for the environment (TargetServer in this case)
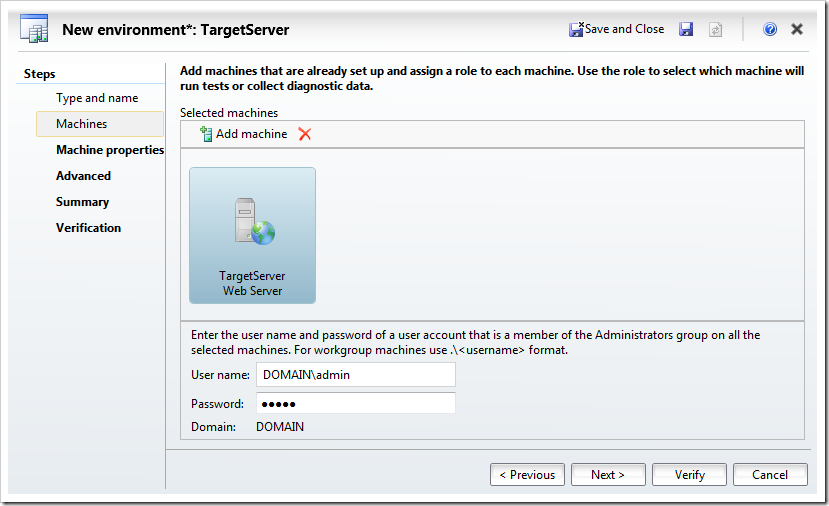
- On the next page, click Add to add a machine to the environment. Enter the name of the machine (TargetServer.Domain.Com), and give it the Web Server role. The name must be reachable both from your machine during configuration and from the TFS app tier server.
You also need to supply an account that is a local administration on the target server. This is needed in order to automatically install a test agent later on the machine.
- On the next page, you can add tags to the machine. This is not needed in this scenario so go to the next page.
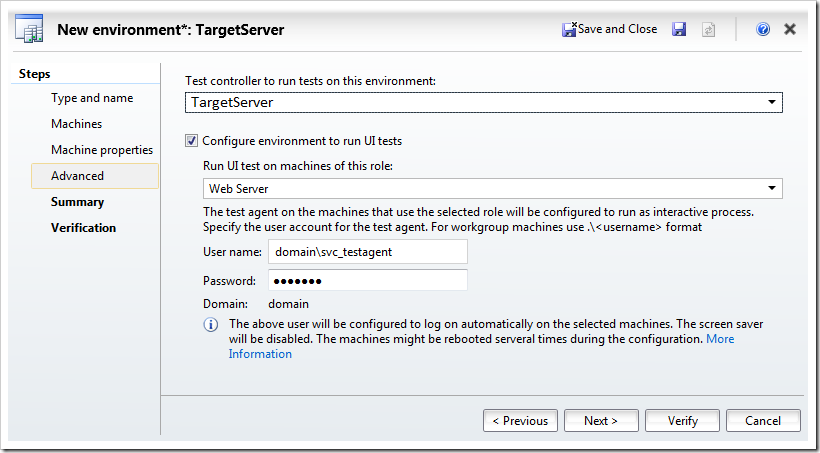
- Here you will specify which test controller to use and that you want to run UI tests on this environment. This will in result in a Test Agent being automatically installed and configured on the target server.
The name of the machine where you installed the test controller should be available on the drop down list (TargetServer in this sample). If you can’t see it, you might have selected a different TFS project collection.
- Press Next twice and then Verify to verify all the settings:
- Press finish. This will now create and prepare the environment, which means that it will remote install a test agent on the machine. As part of this installation, the remote server will be restarted.
3-5. Create Test Plan, Run Test Case, Create Coded UI Test
I will not cover step 3-5 here, there are plenty of information on how you create test plans and test cases and automate them using Coded UI Tests.
In this example I have a test plan called My Application and it contains among other things a test suite called Automated Tests where I plan to put test cases that should be automated and executed as part of the BDT workflow.
For more information about Coded UI Tests, see Verifying Code by Using Coded User Interface Tests
6. Associate Coded UI Test with Test Case
OK, so now we want to automate our Coded UI Test and have it run as part of the BDT workflow. You might think that you coded UI test already is automated, but the meaning of the term here is that you link your coded UI Test to an existing Test Case, thereby making the Test Case automated. And the test case should be part of the test suite that we will run during the BDT.
- Open the solution that contains the coded UI test method.
- Open the Test Case work item that you want to automate.
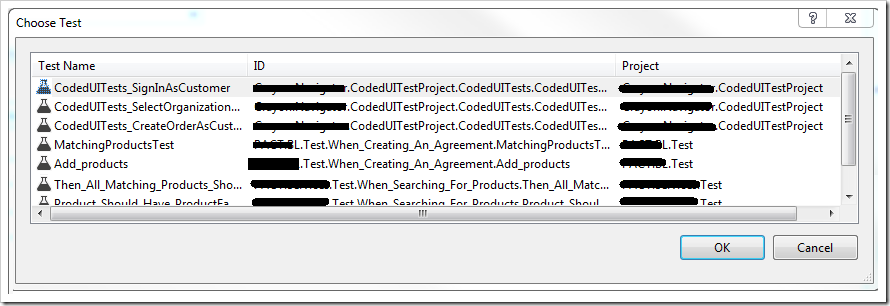
- Go to the Associated Automation tab and click on the “…” button.
- Select the coded UI test that you corresponds to the test case:
- Press OK and the save the test case
For more information about associating an automated test case with a test case, see How to: Associate an Automated Test with a Test Case
7. Create Build Definition using LabDefaultTemplate
Now we are ready to create a build definition that will implement the full BDT workflow. For this purpose we will use the LabDefaultTemplate.11.xaml that comes out of the box in TFS 2012. This build process template lets you take the output of another build and deploy it to each target machine. Since the deployment process will be running on the target server, you will have less problem with permissions and firewalls than if you were to remote deploy your solution.
So, before creating a BDT workflow build definition, make sure that you have an existing build definition that produces a release build of your application.
- Go to the Builds hub in Team Explorer and select New Build Definition
- Give the build definition a meaningful name, here I called it MyApplication.Deploy
- Set the trigger to Manual
- Define a workspace for the build definition. Note that a BDT build doesn’t really need a workspace, since all it does is to launch another build definition and deploy the output of that build.
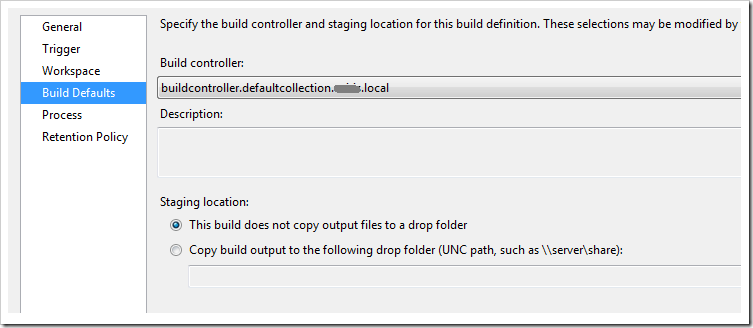
But TFS doesn’t allow you to save a build definition without adding at least one mapping. - On Build Defaults, select the build controller. Since this build actually won’t produce any output, you can select the “This build does not copy output files to a drop folder” option.
- On the process tab, select the LabDefaultTemplate.11.xaml. This is usually located at $/TeamProject/BuildProcessTemplates/LabDefaultTemplate.11.xaml. To configure it, press the … button on the Lab Process Settings property
- First, select the environment that you created before:
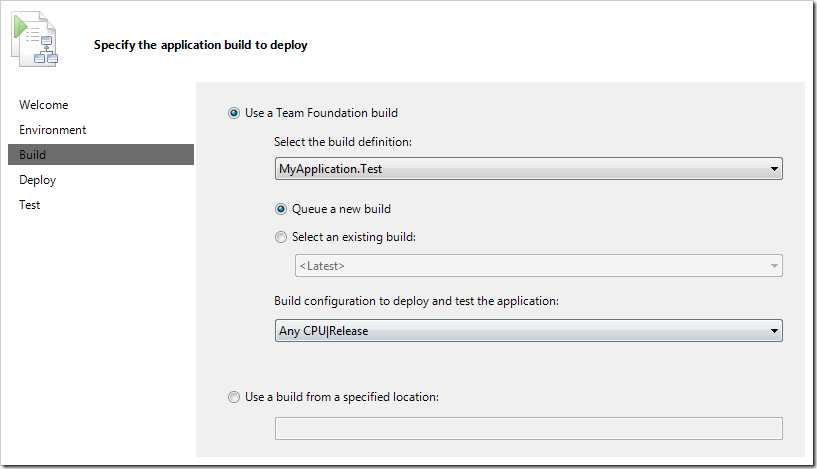
- Select which build that you want to deploy and test. The “Select an existing build” option is very useful when developing the BDT workflow, because you do not have to run through the target build every time, instead it will basically just run through the deployment and test steps which speeds up the process.
Here I have selected to queue a new build of the MyApplication.Test build definition
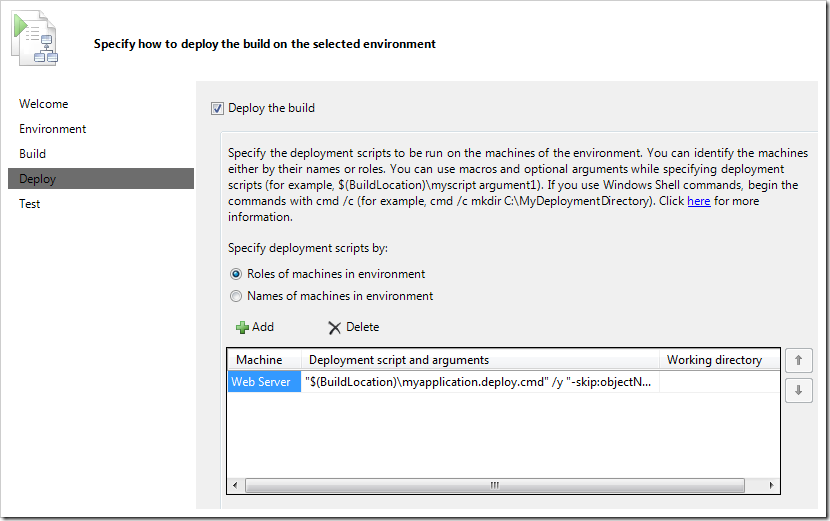
- On the deploy tab, you need to specify how the application should be installed on the target server. You can supply a list of deployment scripts with arguments that will be executed on the target server. In this example I execute the generated web deploy command file to deploy the solution. If you for example have databases you can use sqlpackage.exe to deploy the database. If you are producing MSI installers in your build, you can run them using msiexec.exe and so on.
A good practice is to create a batch file that contain the entire deployment that you can run both locally and on the target server. Then you would just execute the deployment batch file here in one single step.
The workflow defines some variables that are useful when running the deployments. These variables are:
$(BuildLocation)
The full path to where your build files are located$(InternalComputerName_<VM Name>)
The computer name for a virtual machine in a SCVMM environment$(ComputerName_<VM Name>)
The fully qualified domain name of the virtual machineAs you can see, I specify the path to the myapplication.deploy.cmd file using the $(BuildLocation) variable, which is the drop folder of the MyApplication.Test build.
Note: The test agent account must have read permission in this drop location.You can find more information here on Building your Deployment Scripts
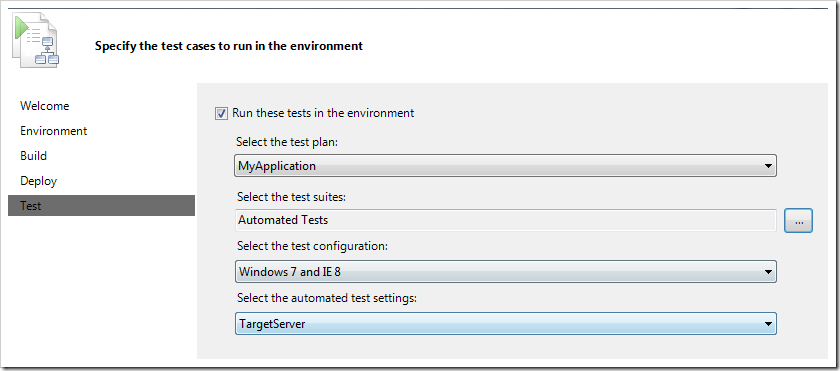
- On the last tab, we specify which tests to run after deployment. Here I select the test plan and the Automated Tests test suite that we saw before:
Note that I also selected the automated test settings (called TargetServer in this case) that I have defined for my test plan. In here I define what data that should be collected as part of the test run.
For more information about test settings, see Specifying Test Settings for Microsoft Test Manager Tests
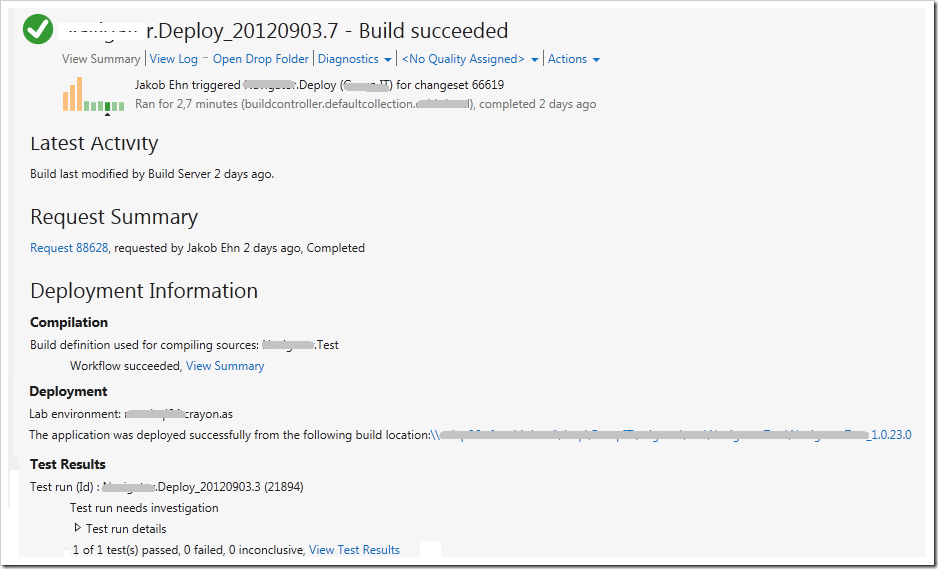
We are done! Queue your BDT build and wait for it to finish. If the build succeeds, your build summary should look something like this:
